How to setup IP addresses from
your LAN using a bridge to your
LXD Containers (DHCP)
井民全, Jing, mqjing@gmail.com
This document shows you how to assign your LXD containers IP address from your host LAN using a
bridge. Whole knowledge was from the Simos Xenitellis blog page[2].
Table of contents
1. Quick 1
2. Procedure 2
2.1. Create a new bridge and Interface to the host 3
2.2. Obtain the IP 3
2.2.1. Setup the brigade IP from DHCP 3
2.2.2. Setup a static IP to your bridge 4
2.3. Use the Bridge 5
2.3.1. Create a new profile for bridge networking 5
2.3.2. List profile 6
2.3.3. Launch a container and use the bridge profile 7
3. References 8
1. Quick
# create a new bridge sudo nmcli con add ifname br0 type bridge con-name br0 # create a bridge br0
# add a interface to ens33 nic sudo nmcli con add type bridge-slave ifname ens33 master br0 # add a interface to nic nmcli connection show
# enable the bridge sudo nmcli con up br0 ip a s br0 # verification
# use the bridge # Step 1: create a profile, called bridge-profile lxc profile create bridge-profile cat <<EOF | lxc profile edit bridge-profile
description: Bridged networking LXD profile devices: eth0: name: eth0 nictype: bridged parent: br0 type: nic EOF |
#Check lxc profile list
# Step 2: Launch the container lxc launch ubuntu:20.04 c3 --profile default --profile bridge-profile
#Verify lxc exec c3 -- /bin/bash ping www.google.com |
2. Procedure
2.1. Create a new bridge and Interface to the host
Step 1: Create a bridge called br0
sudo nmcli con add ifname br0 type bridge con-name br0 # create a bridge br0 |
Step 2: Add an interface to the host nic ens33
sudo nmcli con add type bridge-slave ifname ens33 master br0 # add a br0 interface to nic |
e. g.
nmcli connection show

2.2. Obtain the IP
2.2.1. Setup the brigade IP from DHCP
Setup a DHCP based IP for your bridge
sudo nmcli con up br0 ip a s br0 |

If you do not see the ip that assigned to the br0, try to renew the ip
sudo dhclient -r br0; sudo dhclient br0
Or systemctl restart networking.service
Or Reboot the VM. |
2.2.2. Setup a static IP to your bridge
sudo nmcli connection modify br0 ipv4.addresses '192.168.1.202/24' sudo nmcli connection modify br0 ipv4.gateway '192.168.1.1' sudo nmcli connection modify br0 ipv4.dns '8.8.8.8' sudo nmcli connection modify br0 ipv4.method manual sudo nmcli con up br0 nmcli con show |
e.g. 
2.3. Use the Bridge
2.3.1. Create a new profile for bridge networking
lxc profile create bridge-profile |
Here, the eth0 is the LXD container's nic name, and setup the traffic to the br0 interface via parent parameter.
cat <<EOF | lxc profile edit bridge-profile |
description: Bridged networking LXD profile devices: eth0: name: eth0 nictype: bridged parent: br0 type: nic EOF
|
e.g.

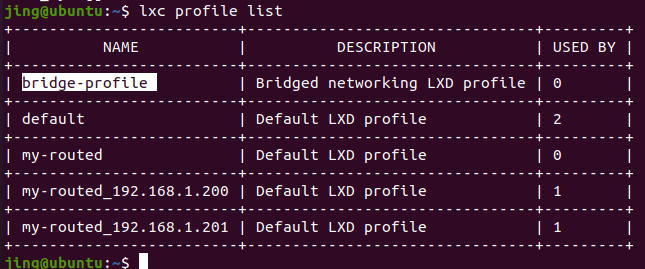
2.3.2. List profile
lxc profile list
2.3.3. Launch a container and use the bridge profile
lxc launch ubuntu:20.04 c3 --profile default --profile bridge-profile |
Verify
lxc exec c3 -- /bin/bash

test : connect from Host
ping 192.168.1.105

3. References
https://www.cyberciti.biz/faq/ubuntu-20-04-add-network-bridge-br0-with-nmcli-command/
https://blog.simos.info/how-to-get-lxd-containers-get-ip-from-the-lan-with-routed-network/