How to write an Android Mapbox APP
井民全, Jing, mqjing@gmail.com
Google doc: (view)
This document is following the guide of MapBox MAP SDK for Android. To make clear, I added some snapshots for each step.
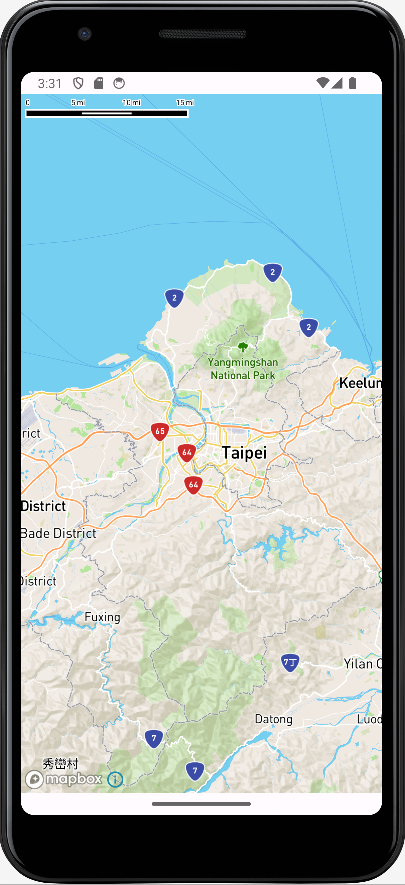
Table of Contents
1. Install Android Studio 2
2. Create New Project 2
2.1. Configure Credentials 3
2.1.1. Setup Secure Access Token 3
2.1.2. Setup Public Token 4
2.2. Configure Permissions 5
2.3. Add the Dependency 6
3. Coding 8
3.1. Add a map 8
4. Run 9
5. Result 10
6. Reference 10
1. Install Android Studio
Official site: https://developer.android.com/studio
2. Create New Project
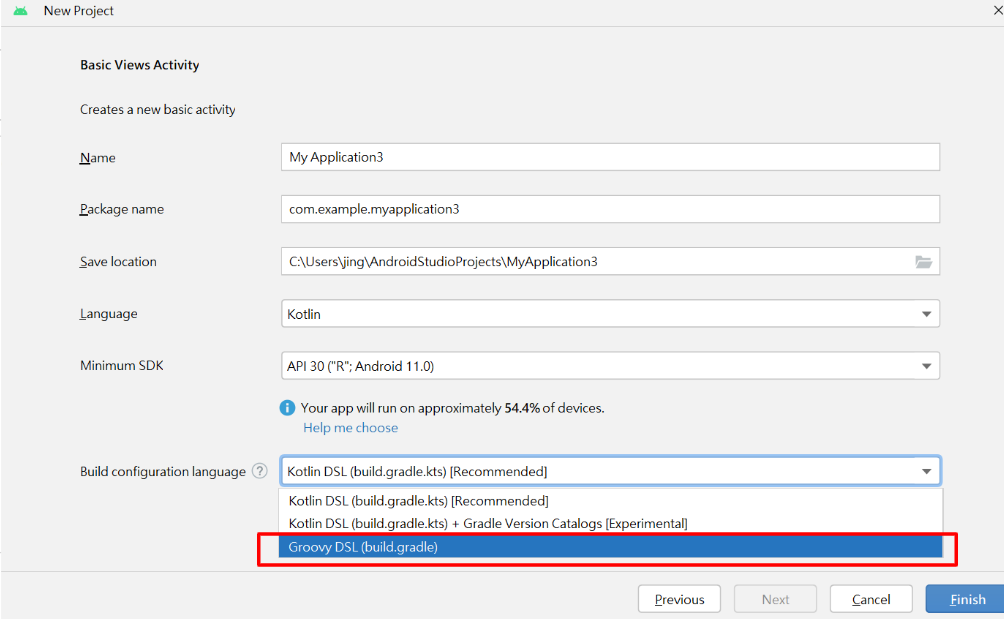
Step 1: Choose a template

Step 2: Setup the project
Choose [Build configuration language]: Groovy DSL (build.grandle)
2.1. Configure Credentials
Get the mapbox (1) public access token and (2)secret access token (Download: Read)
A public access token: From your account's tokens page, you can either copy your default public token or click the Create a token button to create a new public token. A secret access token with the Downloads:Read scope. From your account's tokens page, click the Create a token button. From the token creation page, give your token a name and make sure the box next to the Downloads:Read scope is checked. Click the Create token button at the bottom of the page to create your token. The token you've created is a secret token, which means you will only have one opportunity to copy it somewhere secure.
|
2.1.1. Setup Secure Access Token
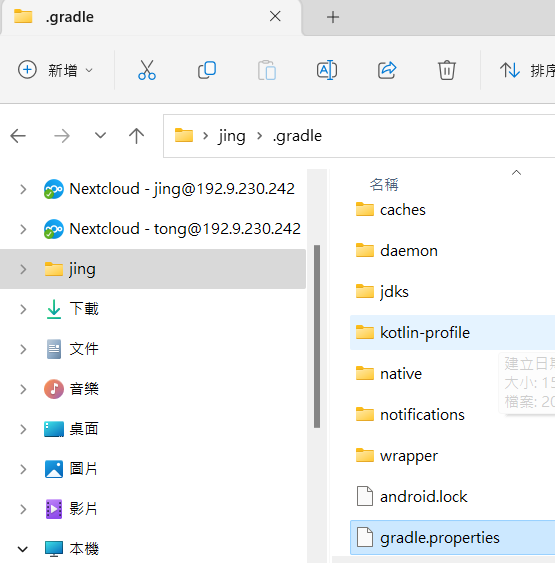
Step 1:Create a file named as gradle.properties
Location: User home/.grandle/
Filename: gradle.propertie
Step 2: Add the token
See this to create the token.
MAPBOX_DOWNLOADS_TOKEN=TOKEN-STRING |
E.g.

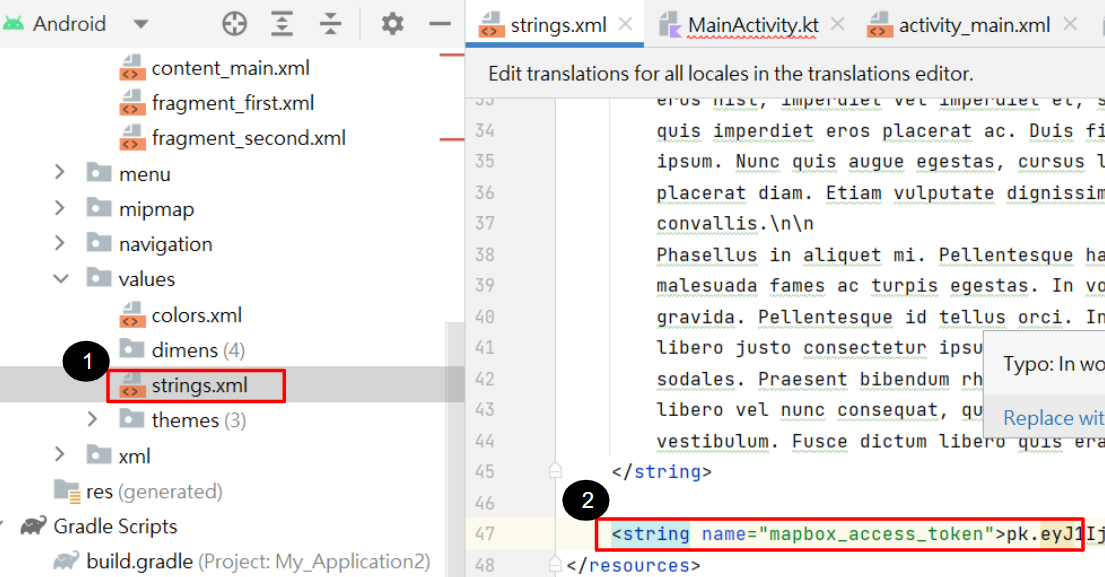
2.1.2. Setup Public Token
2.2. Configure Permissions
If you plan to display user's location, we need to add the following permissions setting.
File: manifests
<manifest ... >
<!-- Always include this permission --> <uses-permission android:name="android.permission.ACCESS_COARSE_LOCATION" />
<!-- Include only if your app benefits from precise location access. --> <uses-permission android:name="android.permission.ACCESS_FINE_LOCATION" />
|
E.g.

2.3. Add the Dependency
Make sure the [Build configuration language] is Groovy DSL (build.grandle).
Step 1: Open [setting.gradle]

Step 2: Setup the configuration as following in blue.
File: setting.gradle
dependencyResolutionManagement { repositoriesMode.set(RepositoriesMode.FAIL_ON_PROJECT_REPOS) repositories { google() mavenCentral() maven { url 'https://api.mapbox.com/downloads/v2/releases/maven' authentication { basic(BasicAuthentication) } credentials { // Do not change the username below. // This should always be `mapbox` (not your username). username = "mapbox" // Use the secret token you stored in gradle.properties as the password password = MAPBOX_DOWNLOADS_TOKEN } } } }
|
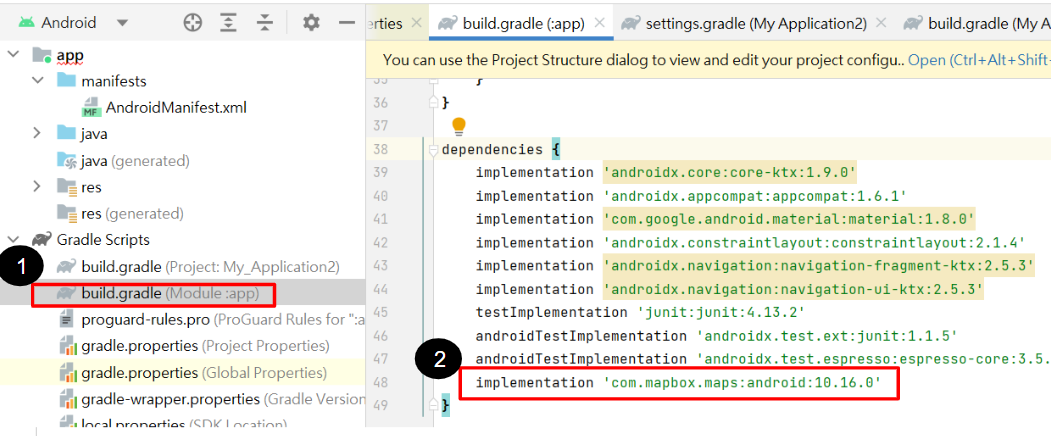
Step 3: Add Mapbox SDK dependency
Open [build.gradle] and add the SDK dependency.
File: build.gradle
dependencies { implementation 'com.mapbox.maps:android:10.16.0' }
|
E.g.
3. Coding
3.1. Add a map
Step 1: Overwrite the MainActivity
File: MainActivity.kt
package com.example.myapplication2
import android.os.Bundle import androidx.appcompat.app.AppCompatActivity import com.mapbox.maps.MapView import com.mapbox.maps.Style
var mapView: MapView? = null
class MainActivity : AppCompatActivity() { override fun onCreate(savedInstanceState: Bundle?) { super.onCreate(savedInstanceState) setContentView(R.layout.activity_main) mapView = findViewById(R.id.mapView) mapView?.getMapboxMap()?.loadStyleUri(Style.MAPBOX_STREETS) } }
|
E.g.

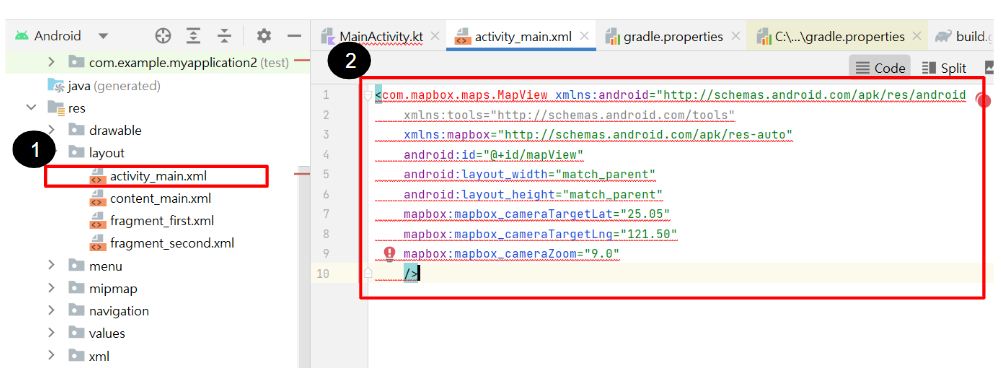
Step 2: Write the layout
File: activity_main.xml
<com.mapbox.maps.MapView xmlns:android="http://schemas.android.com/apk/res/android" xmlns:tools="http://schemas.android.com/tools" xmlns:mapbox="http://schemas.android.com/apk/res-auto" android:id="@+id/mapView" android:layout_width="match_parent" android:layout_height="match_parent" mapbox:mapbox_cameraTargetLat="25.05" mapbox:mapbox_cameraTargetLng="121.50" mapbox:mapbox_cameraZoom="9.0" />
|
E.g.
4. Run
Step 1: Make sure the [Run/Debug configuration] and [Running device]

Step 2: [Run] -> [Run app]

Result
Enjoy!
By Jing.
6. Reference
https://docs.mapbox.com/android/maps/guides/install/