How to deploy your ionic cordova Android app signed with debug.keystore
井民全, Jing, mqjing@gmail.com
Quick
# Step 1: sign with debug.keystore jarsigner -verbose -sigalg SHA1withRSA -digestalg SHA1 -keystore ~/.android/debug.keystore -storepass android -keypass android platforms/android/app/build/outputs/apk/release/app-release-unsigned.apk androiddebugkey
# Step 2: zip $HOME/AndroidSDK/build-tools/29.0.3/zipalign -v 4 platforms/android/app/build/outputs/apk/release/app-release-unsigned.apk platforms/android/app/build/outputs/apk/release/app-release-ok.apk
# check ls platforms/android/app/build/outputs/apk/release/
# Step 3: install to the device ~/AndroidSDK/platform-tools/adb install -r platforms/android/app/build/outputs/apk/release/app-release-ok.apk
# check log ~/AndroidSDK/platform-tools/adb logcat
|
Enjoy!by Jing.
Table of Contents
1. Requirements
1.1. Install the node and the version manager
1.2. Install the Ionic CLI
1.3. Install the Android depends
2. Create a simple Ionic app
3. Build native (dev mode)
4. Debug
4.1. Setup Breakpoint
4.2. Preview (Debug)
4.3. Android device (Debug)
4.3.1. logcat
4.3.2. Connect to the running app (Using Chrome DevTools)
4.3.3. Debug using Android Studio
5. Release (signed with debug.keystore)
5.1. Quick
5.2. Detail
5.2.1. Sign with debug.keystore
5.2.2. Zip
5.2.3. Install to device
5.2.4. adb logcat
1. Requirements
1.1. Install the node and the version manager
curl -o- https://raw.githubusercontent.com/nvm-sh/nvm/v0.34.0/install.sh | bash
# Note: close and re-open a new terminal nvm install --lts # install node, LTS version nvm alias default lts/* # setup default node as the installed node
# check node -v which npm |
1.2. Install the Ionic CLI
npm uninstall -g ionic # uninstall previous install npm install -g @ionic/cli |
1.3. Install the Android depends
sudo apt-get -y install curl openjdk-8-jdk gradle sudo snap androidsdk sudo snap install --classic code # vscode sudo snap install --classic git-ubuntu sudo snap install --classic android-studio sudo snap install chromium
echo y | androidsdk 'platforms;android-29' 'build-tools;29.0.3' 'cmdline-tools;latest' 'emulator' 'platform-tools' |
vi ~/.bashrc export PATH="$HOME/AndroidSDK/platform-tools:$HOME/AndroidSDK/tools/bin:$HOME/AndroidSDK/emulator:$PATH" export JAVA_HOME="/usr/lib/jvm/java-8-openjdk-amd64" export ANDROID_HOME="$HOME/AndroidSDK" export ANDROID_SDK_ROOT="$HOME/AndroidSDK" |
source ~/.bashrc
sudo ln -s ${HOME}/AndroidSDK/platform-tools/adb /bin/adb # for sudo adb path #check adb devices |
2. Create a simple Ionic app
ionic start myApp tabs
# test cd myApp ionic serve # start a previewing (browser) |

3. Build native (dev mode)
Plug the Android device. If you use VirtualBox, check the [device] to enable your Android device from the host.
Step 1: Create native project
npm i -g cordova ionic cordova prepare android # create native project |
Step 2: Setup package id for store
File: ./config.xml
<widget id="io.ionic.starter" |
Step 3: Running with Codova on Android device
ionic cordova run android -l
Or
ionic cordova run android -l --host YOUR-IP // Now, when changes are made to the app's source files, web assets are rebuilt and the
// changes are reflected on the simulator or device without having to deploy again. |
4. Debug
4.1. Setup Breakpoint
Step 1: Add "debugger;" statement.
// This code is copied from here function myBrokenFunction() { debugger; // do other stuff } |
4.2. Preview (Debug)
4.3. Android device (Debug)
Plug the Android device.
4.3.1. logcat
~/AndroidSDK/platform-tools/adb logcat # view the native log |
4.3.2. Connect to the running app (Using Chrome DevTools)
Step 1: Install Chrome (If you haven't installed the Chrome)
sudo snap install chromium |
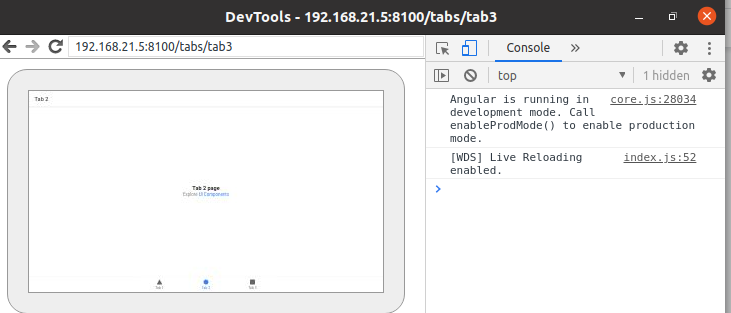
Step 2: Open the DevTools
Open Chrome browser or Chromium browser chrome://inspect |

Result
4.3.3. Debug using Android Studio
Step 1: Open the project location: platforms/android

Fig. The Android native project.
5. Release (signed with debug.keystore)
5.1. Quick
# Step 1: sign with debug.keystore jarsigner -verbose -sigalg SHA1withRSA -digestalg SHA1 -keystore ~/.android/debug.keystore -storepass android -keypass android platforms/android/app/build/outputs/apk/release/app-release-unsigned.apk androiddebugkey
# Step 2: zip $HOME/AndroidSDK/build-tools/29.0.3/zipalign -v 4 platforms/android/app/build/outputs/apk/release/app-release-unsigned.apk platforms/android/app/build/outputs/apk/release/app-release-ok.apk
# check ls platforms/android/app/build/outputs/apk/release/
# Step 3: install to the device ~/AndroidSDK/platform-tools/adb install -r platforms/android/app/build/outputs/apk/release/app-release-ok.apk
# check log ~/AndroidSDK/platform-tools/adb logcat
|
5.2. Detail
5.2.1. Sign with debug.keystore
jarsigner -verbose -sigalg SHA1withRSA -digestalg SHA1 -keystore ~/.android/debug.keystore -storepass android -keypass android platforms/android/app/build/outputs/apk/release/app-release-unsigned.apk androiddebugkey |
5.2.2. Zip
$HOME/AndroidSDK/build-tools/29.0.3/zipalign -v 4 platforms/android/app/build/outputs/apk/release/app-release-unsigned.apk platforms/android/app/build/outputs/apk/release/app-release-ok.apk |
5.2.3. Install to device
~/AndroidSDK/platform-tools/adb install -r platforms/android/app/build/outputs/apk/release/app-release-ok.apk |
5.2.4. adb logcat
~/AndroidSDK/platform-tools/adb logcat |